Sunday, September 10, 2006

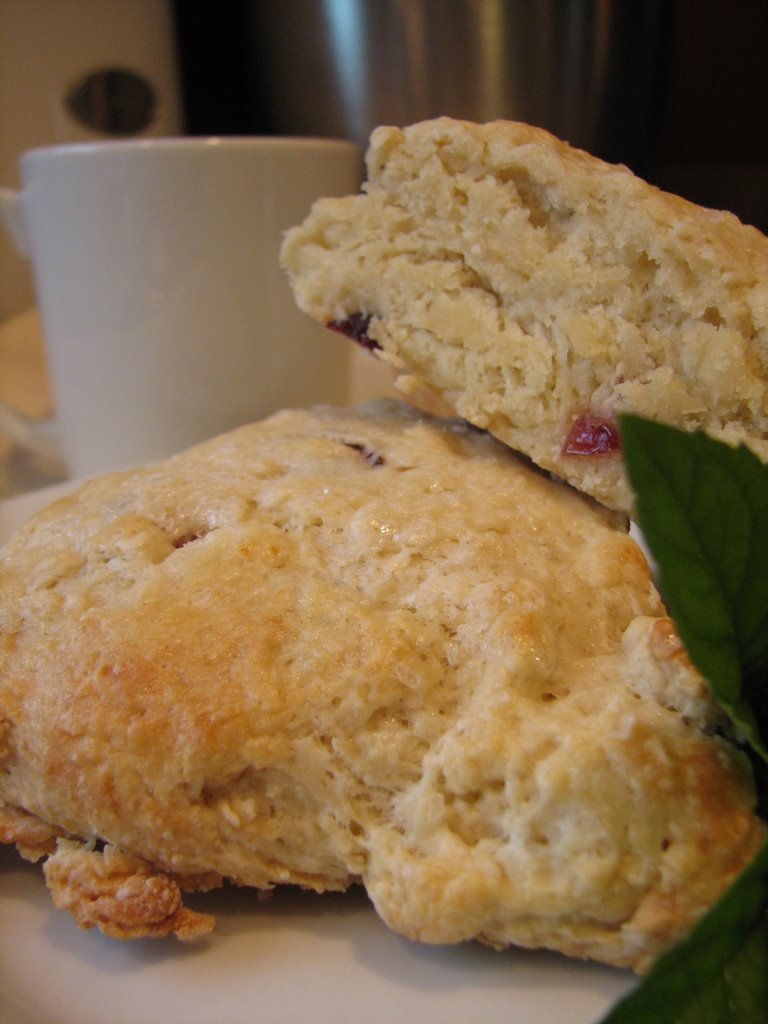
Cranberry Scones

I was flipping through my good old Better Homes and Gardens Cookbook the other night while lying in bed and I marked a few recipes that I haven't made in awhile. This scone recipe was actually better than I recalled. It was a nice break from our usual pancakes and waffles. It was also a good way to use up some buttermilk and dried cranberries that I had around. I'll definitely be making these again. Maybe next time I'll even make a little whipped cream to top them off with...yum!

Buttermilk-Cranberry Scones
adapted from Better Homes and Gardens New Cookbook

2 c all-purpose flour
1/4 c sugar
2 t baking powder
1/4 t baking soda
1/3 c butter
1 egg
1/2 c buttermilk
1/4 dried cranberries
2 t sugar crystals
1 T buttermilk

Stir together flour, sugar, baking powder, baking soda, and salt. Using a pastry cutter, cut in butter until mixture resembles coarse crumbs. Make a well in the center of the dry mixture.
In another bowl, combine egg, buttermilk, and cranberries. Stir and then add mixture to dry ingredients. Stir until just moist.
Turn dough out onto a lightly floured surface. Quickly knead dough 10-12 strokes or until dough is nearly smooth. Pat dough into a 7-inch circle. Cut into 6 wedges. Place wedges 1 inch apart on an ungreased baking sheet.
Brush scones with buttermilk and then sprinkle with sugar crystals. Bke in a 400 degree oven about 12 minutes or until slightly golden.

Wednesday, September 06, 2006

Apple Danish

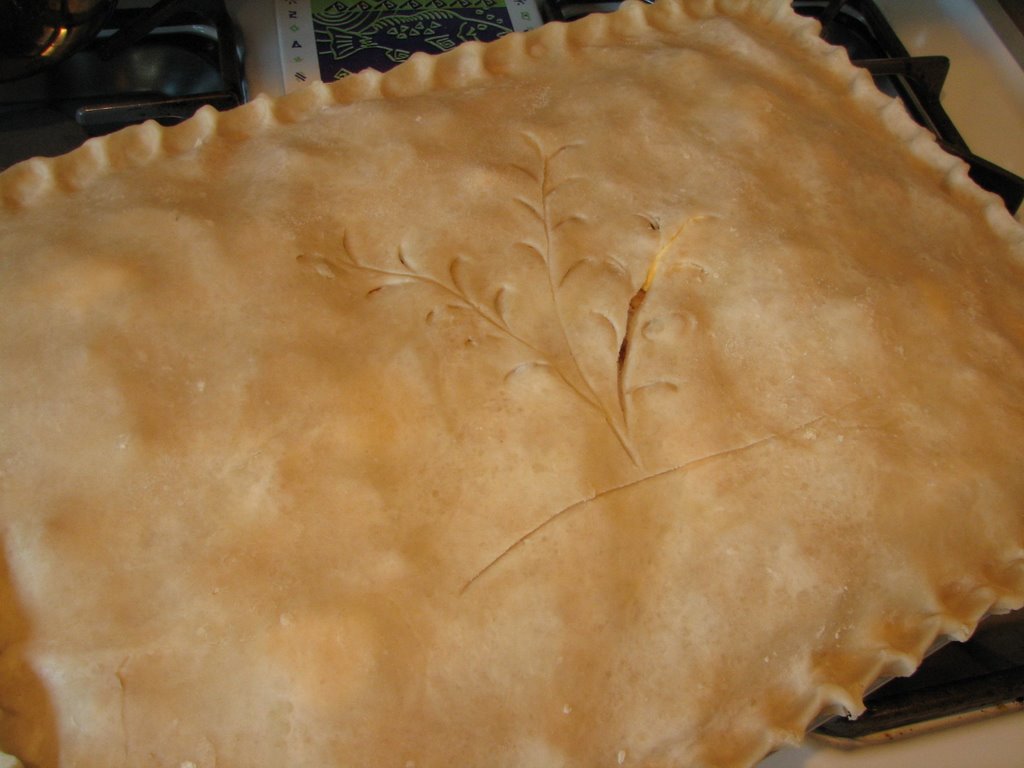
Joseph lost another bet at work...this one cost him 10 lunches. Later he made a deal with the winner...which included me making something worth 5 lunches. Since the bet was about leading apple producing states I thought it was only fitting that apples be included in the winners trophy. I just happened to have a bag of apples from our last trip to Michigan - thank you Grandma and AnnaLee - so I got to work on a family favorite. This apple danish recipe - you know I can't even call it a recipe, since I've never seen one used to make this - so I should say, this apple danish method is a family favorite. For years I helped my grandmother, aunt, and my mother make this danish multiple times each fall. We'd sit around trying to see who could get the longest apple peelings while talking and laughing the day away. Although I don't recall ever seeing the whole process done in conjunction since there were usually 8 hands at work on different parts, I pieced it together a few years back and started making it for my own family. I must admit that it isn't nearly as much fun working solo...in fact it was a little lonely as I recalled the fun we had making it at mom's house.
So, here is the method...but it is not precise by any means. We usually make a large sheet of it which disappears within a day, no kidding. We make an extra large batch of pie crust like what you find on the back of the Crisco tub. Once you have the bottom rolled out and in the pan we spread a layer of Rice Krispies on the bottom - yes, you heard me right. After that we layer on the sliced apples that have been mixed with sugar and cinnamon. Place a few dollops of butter around for good measure and roll on the top layer of crust. Crimp the edges and then smear the entire top with a layer of egg whites that have been whipped until semi-stiff. Bake at 350 until golden. Let cool and then drizzle on icing made with confectioner's sugar, vanilla, and milk. Enjoy. This is terrific hot, warm, cool, cold...you get the picture.

Monday, September 04, 2006

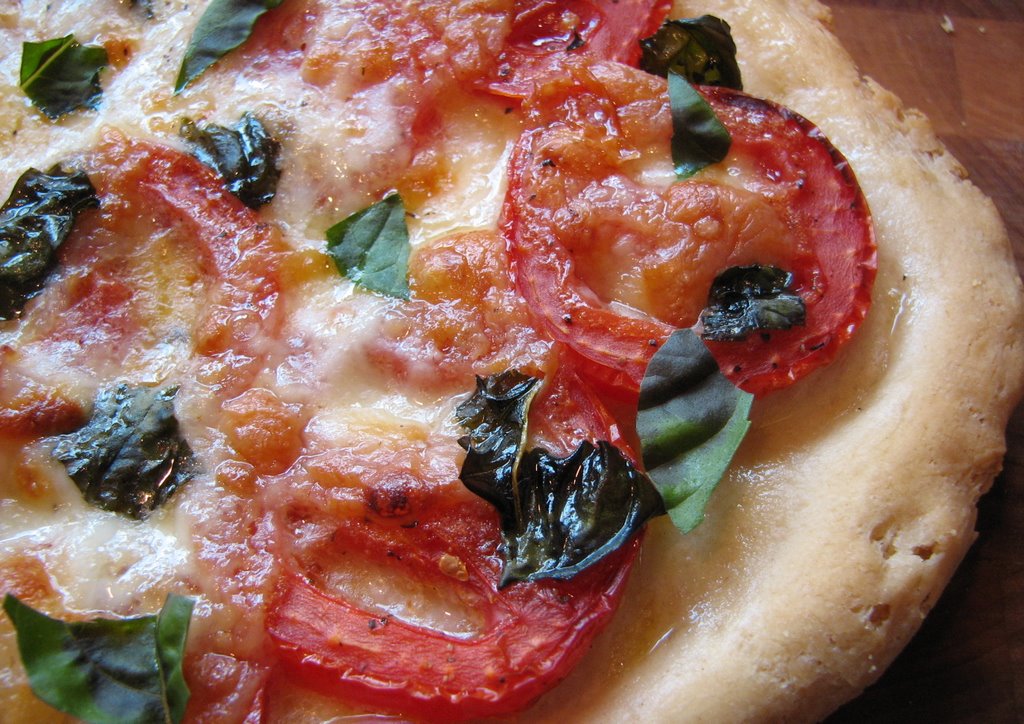
La Festa al Fresco - Margherita Pizza

I noticed creampuffsinvenice announced her La Festa al Fresco challenge awhile back and I have been thinking about what I'd like to make... for a long time now. I even stopped by the library and picked up a few cookbooks to get a little inspiration. I brought home a few including Saveur Cooks Authentic Italian. This cookbook is not only inspirational and beautiful but it makes you so hungry you have to keep sopping up the drool as you flip the pages.
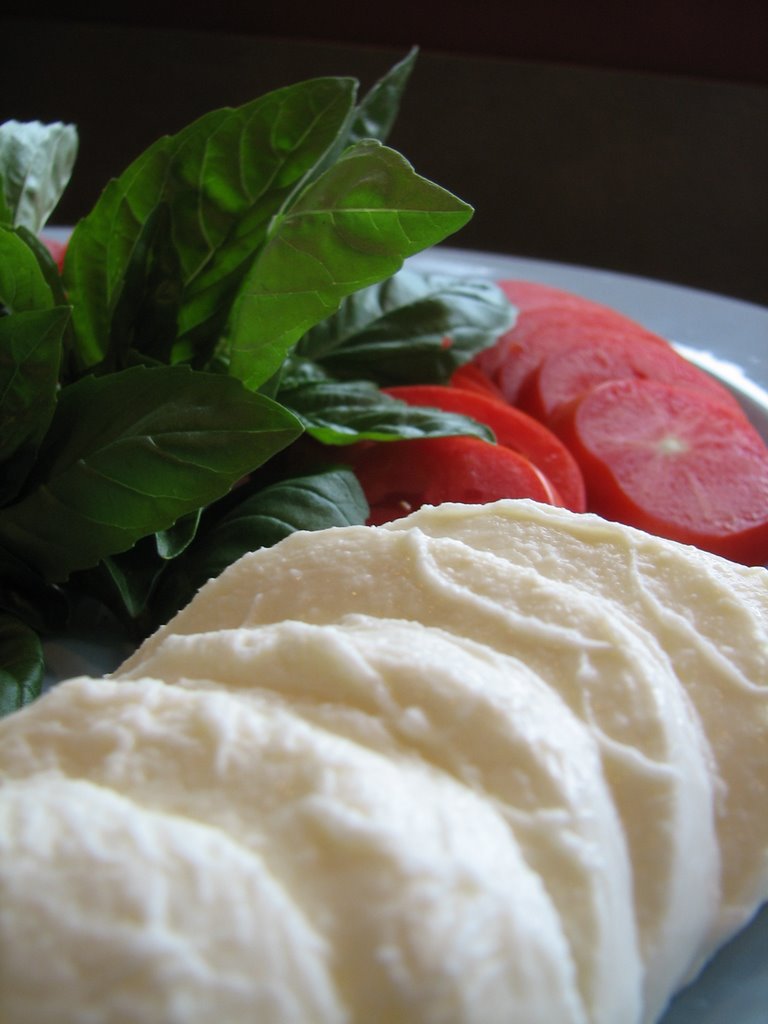
After finding a few recipes that looked mighty delicious I settled on Pizza Margherita since the others didn't have much in terms of fresh ingredients. Plus, I was planning on company today and I wanted something fun to make with them. So, I got to work on a double batch of the dough before heading out to stop at the local farmstand. Once the dough was tucked away to rise I set out to pick up the plum tomatoes, fresh basil, and fresh mozzarella to complete the meal.
Once home I sliced everything up and arranged it for easy pizza assembly and started on dessert.  Make you own pizza night is one of my favorite way s of entertaining.  Everyone can help themselves to the toppings they like and everyone gets involved.

Pizza Dough
adapted from Saveur Cooks Authentic Italian

1 7-gram packet actice dry yeast
1 1/2 c all-purpose flour
1 1/2 c cake flour
1 tsp. salt
extra-virgin olive oil
1/2 c cornmeal

1. Dissolve yeast in 1/4 c lukewarm water in a large bowl. Set aside until yeast begins to activate, about 10 minutes. Combine flours and salt in a small bowl. Add 1 cup flour mixture to yeast and stir well. Mix in 1/2 cup water, then add another cup of flour and continue to stir. Add remaining flour, then gradually stir in about 1/4 cup water and mix well. The dough should be fairly soft but not too wet.
2. Turn out dough on a lightly floured surface and knead with the heels of your palms until it has a smooth, uniform texture, about 10-12 minutes. Divide dough into 2 equal balls. Coat the insides of 2 medium bowls with 1/2 tsp. oil each. Place dough in bowls, cover with damp cloths or plastic wrap. Set aside to rise until doubled in bulk, about 2 1/2 - 3 hours.
3. Punch down dough from one bowl, make a ball, and flatten it on a cornmeal sprinkled peel or sheet. Stretch dough into a 12" circle with a slightly raised edge. Add toppings and slide onto a hot pizza stone.
4. Bake until crust is golden brown and crisp, about 10 - 12 minutes at oven's highet setting. Drizzle with a little olive oil on each and serve.

For the Margherita toppings I sliced, seeded, and salted 2 pounds of plum tomatoes. I let the salt pull out the extra moisture before layering them on the dough. I also added a little pepper for taste. Then I added the sliced mozzarella and topped it off with the torn basil. After pulling them out of the hot oven I added a little extra fresh basil and oilve oil. Ciao!

Thursday, August 31, 2006

Homegrown Plum Coffee Cake


When I was little I remember picking grapes, cherries, apples, and pears in the northwest corner of my parents' front yard. My mother had a grape arbor and an orchard. I remember it being a fun place to play but even more memorable was that it was an awful place to mow. I would take the tractor and drive around and around and around...nearly losing my head with each swipe. I never really appreciated the fruit that came from the trees. We made a few pies and tarts, but mostly we ate the fruit straight and threw the pits as far as we could into the pasture. The fruit was good but it was more of a novelty. We'd look for the largest juiciest specimens and eat them up. The rest were mostly attacked by the birds or taken over by worms.
Back then it didn't seem like those trees produced all that much fruit. So, it took me by surprise when I saw them recently. They were overloaded...to the breaking point...literally. I guess I remember Mom mentioning that she'd had to prop up branches to save them from breaking under the weight of all the fruit. But, I couldn't imagine there being that much fruit. Over the years I've come to appreciate those fruit trees a bit more...actually I'm a bit jealous of the variety and availability of fruit that she has all summer and fall. Nothing is more satisfying than eating and baking with produce that you have grown and harvested with your own two hands. I know how much joy my little tomato and pepper plants bring to me and barely get enough for a meal from them. So, I can only imagine how it must feel to grow an entire orchard full of sweet juicy fruit. Good work mom!
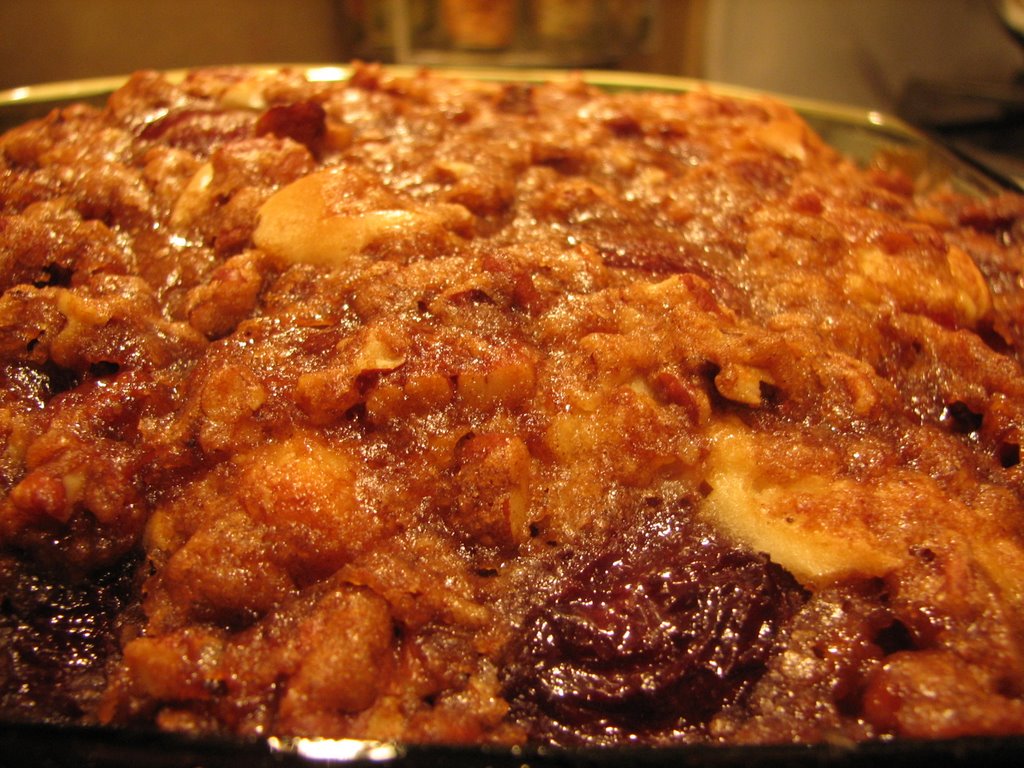
Here I've made Plum Coffee Cake using 10 of mom's fresh plums. It turned out very yummy...although I think I might even prefer it without the topping. The cake was good enough on it's own. Find the recipe here.

Wednesday, August 23, 2006

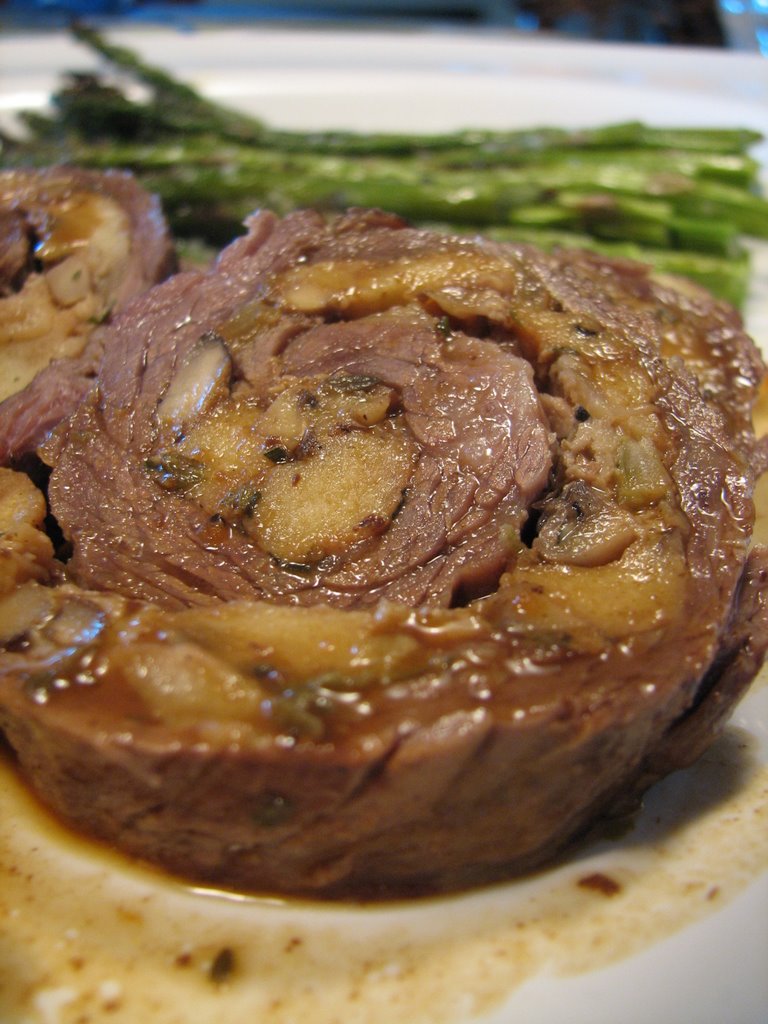
Birthday Bash - Rolled Skirt Steak

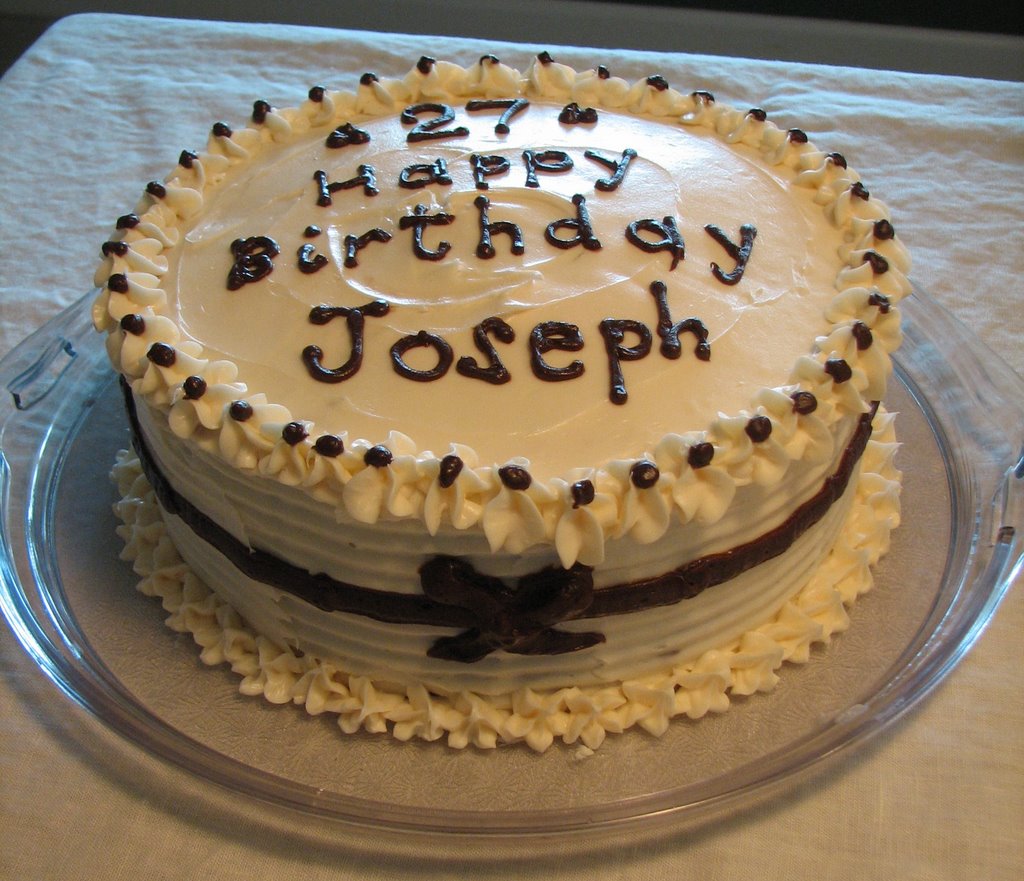
Today we celebrated Joseph's birthday. In the past, I've always made a big meal with lots of appetizers and showy drinks but we figured it was too much with the baby and everything. So we actually planned on ordering out for the big day... however we couldn't think of anything that we really wanted to eat. So, I looked in the fridge and pulled out a skirt steak that I had bought the other day. I hopped on the internet and searched around until I found this recipe. I followed it pretty closely except I substituted toasted Wonder bread cubes for brioche and I omitted the arugula, pine nuts, and red wine. I did add some of the demi-glaze that I still had in the fridge though. I also pounded the skirt steak out a bit so that it was flatter before rolling. Ok, so maybe I didn't follow it that closely!
This turned out so much better than I ever imagined. It was tender, juicy, and very flavorful. Joseph gave it rave reviews and said it is definitely a keeper. He said it was the best tasting beef he'd had for the price of the cut. He mentioned that it had a very complex flavor and he wanted to eat more except he needed to keep room for dessert. I served it with mashed potatoes, bread, and asparagus.
I spread the prep time out over two days which really helped out. I made the stuffing and rolled the steak yesterday and secured it with toothpicks. This made the roll easier to deal with today and it held its' shape really well. I also made the birthday cake yesterday. This gave me time to decorate and get balloons for the big celebration.
Dessert was another highlight. I made a vanilla and chocolate checkerboard cake. It had chocolate icing inbetween the layers and I served it with some homemade chocolate ice cream. For the ice cream I used the same base as the one from my earlier post except I omitted the vanilla. I changed it up by using a couple of Special Dark chocolate bars I had leftover from some brownies. I chopped the chocolate up and placed it in a bowl with a handful of semi-sweet chocolate chips. I poured some of the hot cream mixture on it and let it set for 5 minutes or so. Then I whisked it together and added it back into the rest of the cream mixture. Then I followed the recipe from that point on. It was so good. It turned out creamy, luscious, and chocolately without being too sweet. It was a good compliment to the super sweet birthday cake.

Tuesday, August 22, 2006

Beer Can Chicken

Last night I decided to try Beer Can Chicken for the first time. It was easy enough and it turned out super tasty. There wasn't much of a beer flavor, the chicken was juicier though. All I had to do was clean off a whole chicken, pat it dry, sprinkle on our favorite spices and set it on top of a half-full can of beer.
I placed it in the middle of a medium-hot grill and left it alone for about an hour and 10 minutes...we poked it with a knife and the juices were clear so we took it off and let it rest for a few minutes before slicing. Easy to make and practically no dishes to clean up afterwards. This was great with a salad and some mushroom and onions. We sliced the leftovers and Joseph is having it in a sandwich today.

Sunday, August 20, 2006

Vanilla Bean Ice Cream

The other day I was grabbing something from the basement when I noticed something on a shelf nearby. I turned and saw that it was the ice cream attachment for my KitchenAid that had caught my eye. I popped it into the freezer without a second thought and returned to whatever it was I had been doing.
Today I happened to remember placing it in the freezer while I was grocery shopping. So, I dropped by the dairy case and picked up a few ingredients before leaving.
Later I found a quick and easy recipe, made a few adjustments, and started making the custard. Today I took my time and followed the directions perfectly, evening allowing the mixture to completely cool before trying to churn it. (This is an important step that I happened to have learned the hard way!) So, after dinner and a little freezer time, we broke out the banana split bar. Yum Yum. The ice cream turned out creamy, smooth, and very tasty. It was good alone and even better with accompaniments.

Vanilla Bean Ice Cream
adapted from riceandnoodles

1 1/2 cup milk
1 1/2 cup half & half
1/2 cup sugar
1 vanilla bean
6 egg yolks

Place the milk and half & half in a heavy saucepan. Split the vanilla pod and scrape out the seeds. Place the vanilla bean and seeds into the milk mixture and stir together. Simmer mixture on low for about 15 minutes, stirring constantly.
In a heat proof mixing bowl stir together the egg yolks and sugar. Gradually add the hot milk mixture and whisk together. Once everything is incorporated return it to the saucepan. Simmer an additional 10 minutes (stirring constantly) on low or until the back of a wooden spoon is coated. Mixture should be slightly thickened.
Bring to room temperature and then place in a clean bowl. Cool in the refrigerator for one hour.
Once cooled place mixture in ice cream maker. Churn until thick, about 30 minutes. Serve as is or freeze an additional 3 hours for firmer texture.

Thursday, August 10, 2006

Barefoot Contessa's Outrageous Brownies

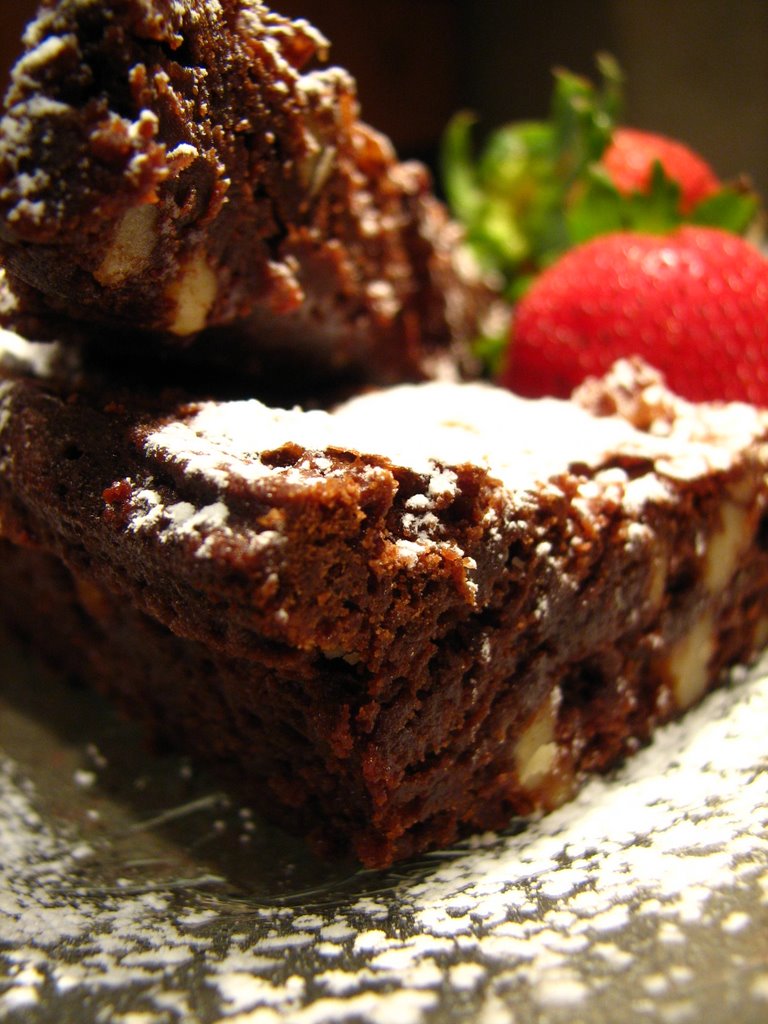
Barefoot Contessa is one of my favorite Food Network shows. I love the way Ina uses ordinary ingredients and makes very do-able dishes. Although many of her recipes are not healthly - they always look very yummy. I received one of her cookbooks from my husband a year or two ago and I have made many of her savory dishes. This was my first attempt at one of her desserts. We only kept the amount in the picture - since I'm sure there are 5 gazillion calories in it, so I sent the rest to work with Joseph.

Outrageous Brownies
adapted from Foodnetwork - Ina Garten's Barefoot Contessa

1 pound unsalted butter
1 pound semisweet chocolate chips
6 ounces unsweetened chocolate (I used special dark instead)
6 extra-large eggs
3 tablespoons instant coffee powder
2 tablespoons real vanilla extract
2 1/4 cups sugar
1 1/4 cups all-purpose flour, divided (1 cup for batter and 1/4 cup in the chips and nuts)
1 tablespoon baking powder
1 teaspoon kosher salt
3 cups diced walnut pieces
Preheat oven to 350 degrees F. Grease and flour a 13 by 18 by 1 1/2-inch sheet pan.
Melt together the butter, 1 pound chocolate chips, and unsweetened chocolate on top of a double boiler. Cool slightly. Stir together the eggs, instant coffee, vanilla and sugar. Stir in the warm chocolate mixture and cool to room temperature.
Stir together 1 cup of the flour, baking powder and salt. Add to cooled chocolate mixture. Toss the walnuts and 12 ounces of chocolate chips with 1/4 cup flour to coat. Then add to the chocolate batter. Pour into prepared pan.
Bake for about 30 minutes, or until tester just comes out clean. Halfway through the baking, rap the pan against the oven shelf to allow air to escape from between the pan and the brownie dough. Do not over-bake! Cool thoroughly, refrigerate well and cut into squares.


These were indeed very delicious. They are not cake-like and not too heavy. They were something inbetween and very delectable. I would make these for a speical occasion where everyone else eats them and I just get compliments - not calories.

Tuesday, August 08, 2006

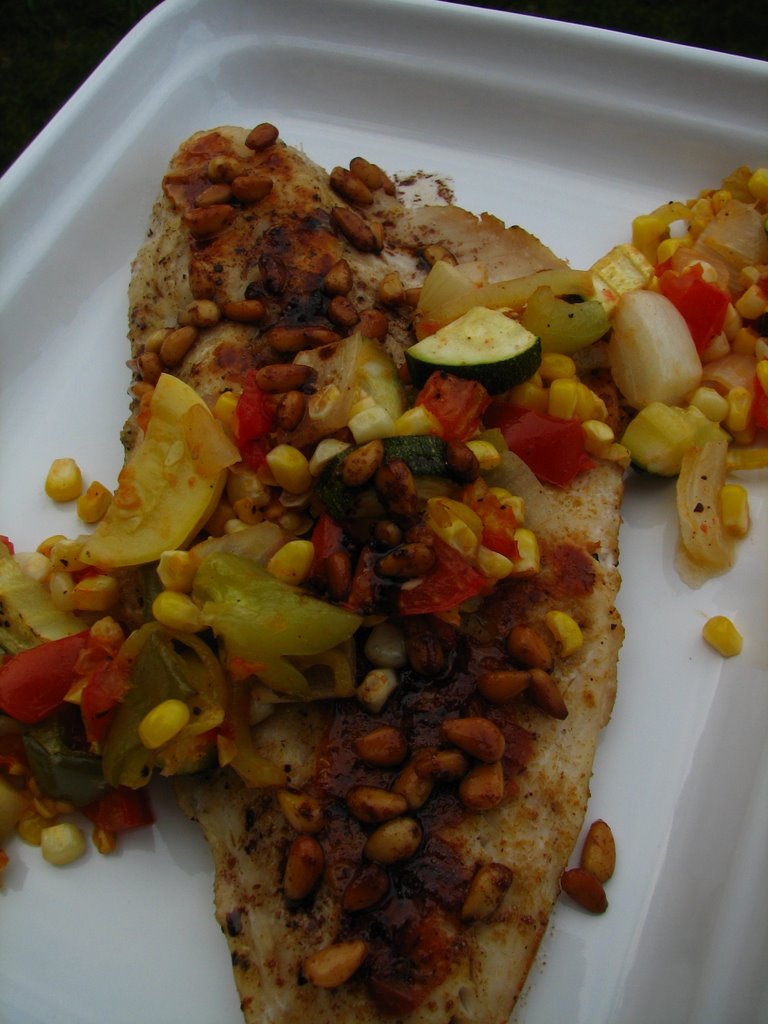
Walleye with Balsamic and Pine Nuts

The other day I received the current edition of Better Homes and Garden. As I was flipping through the recipe section...first of course...I stumbled upon a recipe for trout with a hazelnut balsamic reduction and thought I might be able to substitute some of our freshly caught walleye. I also figured that substituting pine nuts for hazelnuts wouldn't be a bad thing, so I got to work.

Walleye with Balsamic and Pine Nuts
adapted from Better Homes and Garden - September 2006

2 10-12 oz. walleye fillets
1 tsp. ground cumin
3/4 tsp. salt
1/4 tsp. ground black pepper
1 Tbsp. olive oil
4 Tbsp. butter
1/4 c pine nuts
2 Tbsp. lemon juice
2 Tbsp. balsamic vinegar

Sprinkle fish with cumin, salt, and 1/8 tsp. pepper. Heat oil in a large skillet over medium-high heat. Add fish and cook for 2-3 minutes. Turn and cook 2-3 more minutes or until fish flakes easily. Transfer to serving platter.
For the sauce, reduce heat to medium and add butter and nuts. Cook, stirring often, 1 1/2 - 2 minutes. Butter and nuts should begin to brown. Stir in lemon juice and vinegar; cook for 30 seconds until slightly thickened (aroma will be stron.) Add remaining pepper. Pour over fish and serve immediately.

I served this with roasted vegetables.

This turned out to be an interesting dish. I really liked the tangy sweetness of the vinegar and the toasty nut flavor with the fish. I never would have paired them together without finding this recipe. I was also excited to try the new bottle of balsamic vinegar that I picked up awhile back. Yummy. It was definitely a change of pace from the normal fish dish.


Saturday, August 05, 2006

Wild Canadian Walleye

We've just gotten back from the most wonderful vacation in the Canadian Wilderness. This was our second visit to Mache - Kino Lodge, which is located northeast of Chapleau, Ontario. We've spent the past 5 days fishing for walleye and spending time with family and friends. We had a terrific time motoring around the lakes and rivers taking in the natural beauty of the land and dropping our lines in to see what we could catch.
We ate plenty of fish while there. Two afternoons were spent preparing shore lunches...a lunch including the freshly caught fish (cleaned on the side of the river), fried potatoes, baked beans, bread, and roasted marshmallows. We also enjoyed two fish dinners prepared by the wonderful staff at the lodge. So, I was anxious to try something new with the fish that we brought home with us. I looked around and found a delicious looking take on one of my favorites - crab cakes. Here I've made Walleye Cakes with Dill Sauce.

Walleye Cakes with Dill Sauce
http://www.lake-erie-fishing.com/recipe.html

1 pound cooked walleye fillets, flaked

1 stalk celery, chopped
1/4 cup onion, chopped
2 Tbsp. mayonnaise
1 large egg slightly beaten
1 Tbsp. chopped fresh parsley
1 tsp. fresh lemon juice
A few drops of hot pepper sauce
1/2 tsp. salt
3/4 cup Ritz cracker crumbs
3 Tbsp. Veg Oil
Sauté onions and celery in the oil. Mix into walleye and add
all other ingredients except the cracker crumbs. Form into patties and coat each side with cracker crumbs like you would for salmon patties. Brown in butter or margarine.
Serve with lemon wedges.


Dill sauce

1/4 cup mayo
1/4 cup sour cream
2 Tbsp. chopped fresh dill weed
Combine and serve on cakes.
These turned out to be quite delicious and very different than the fried walleye that we've enjoyed this past week.

Posts You Might Enjoy

Related Posts Plugin for WordPress, Blogger...